Customizing and Compiling Marlin Firmware with Visual Studio
Downloading VS Code and Marlin project sources
- Download and Install Visual Studio Code https://code.visualstudio.com/
- Download the Marlin firmware source code bundles. https://github.com/MarlinFirmware
- If you have git installed and know how it use it clone the following repos, if you don't have git or related knowledge just download the compress version of each repo and extra to a working directory of your choosing (click 'code' download as zip)
- Marlin
- git clone https://github.com/MarlinFirmware/Marlin.git
- git checkout 2.1.x
- Configurations
- git clone https://github.com/MarlinFirmware/Configurations.git
git checkout release-2.1.1
- Launch Visual Studio Code
- Open the 'Marlin' project source code directory: File -> Open Folder
- Visual Studio Code should automagically detect that their is an AutoBuild configuration available for this project and prompt you to install the necessary addons:
- platform io
- auto marlin build
- others c++ and juypiter
Setting up VS Code to use Marlin Autobuild
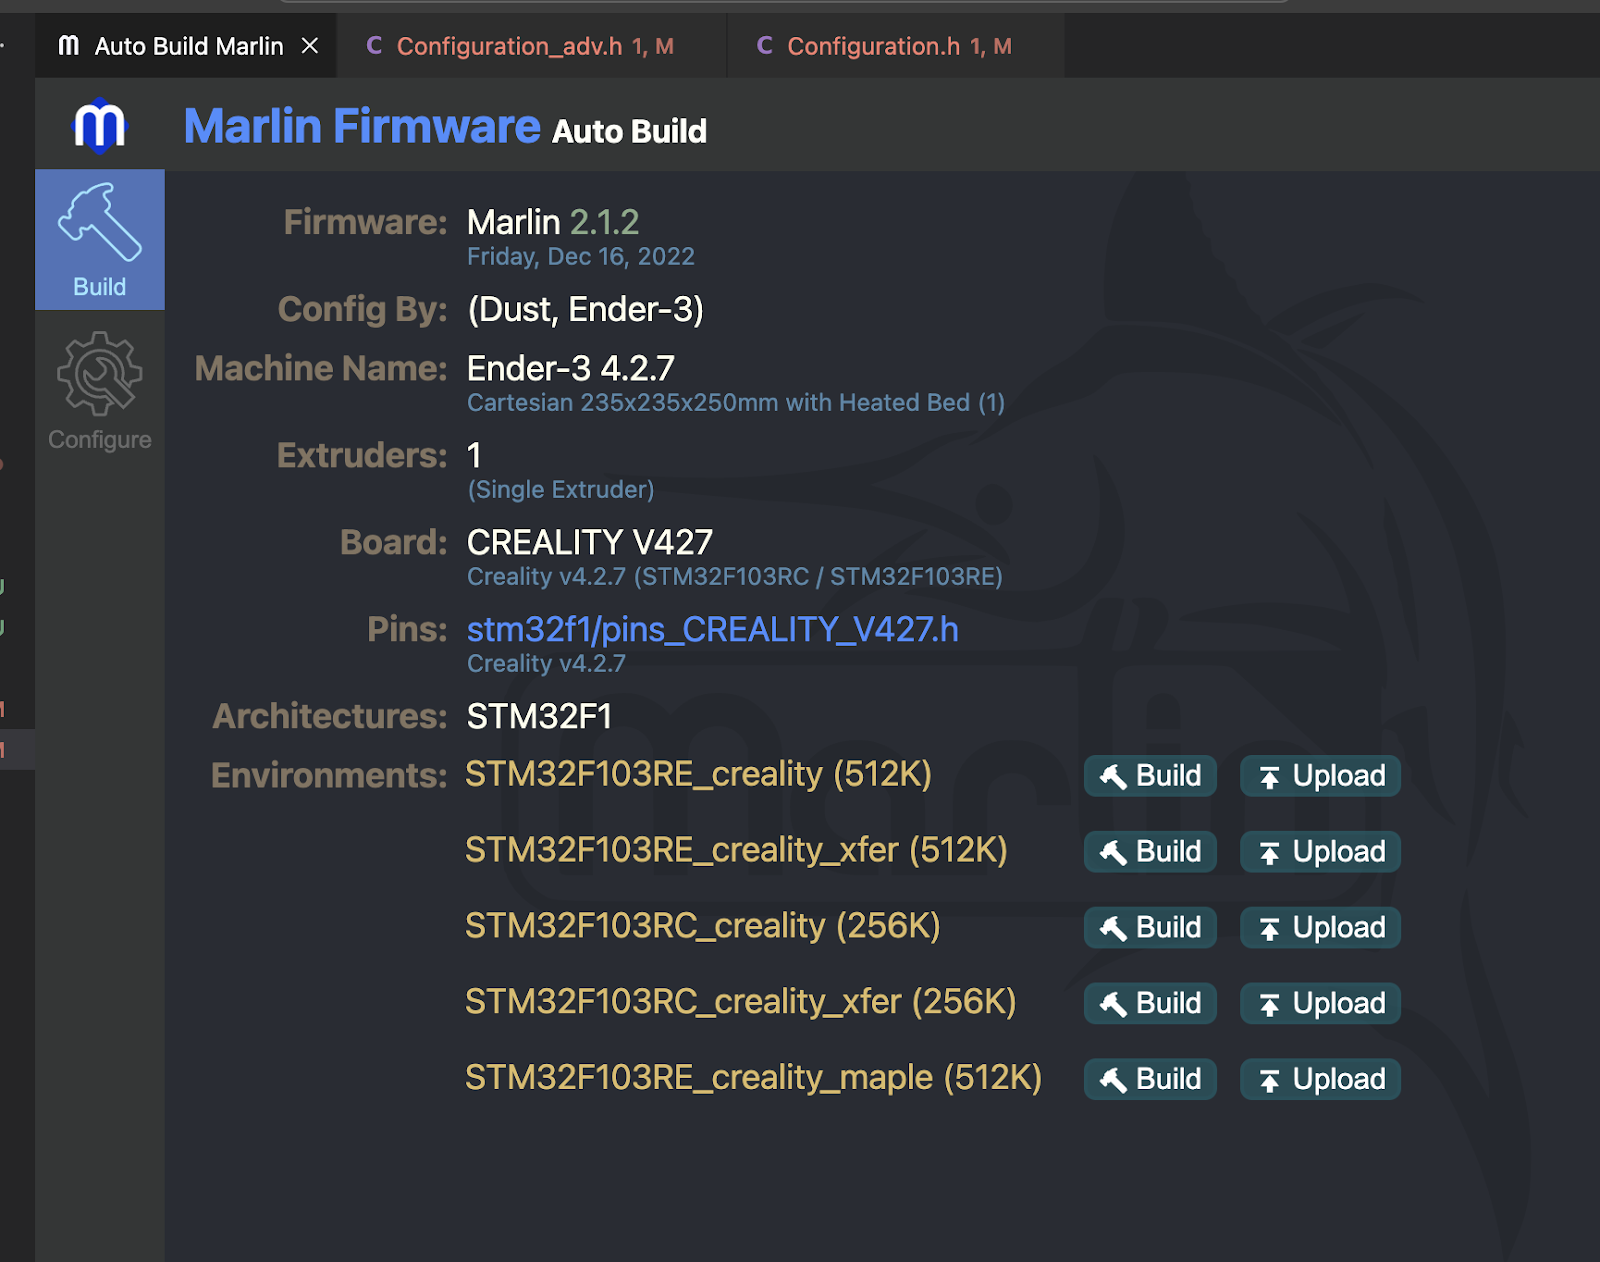
- Now if you got this far without getting stumped you should see something like the following image in VS Code :
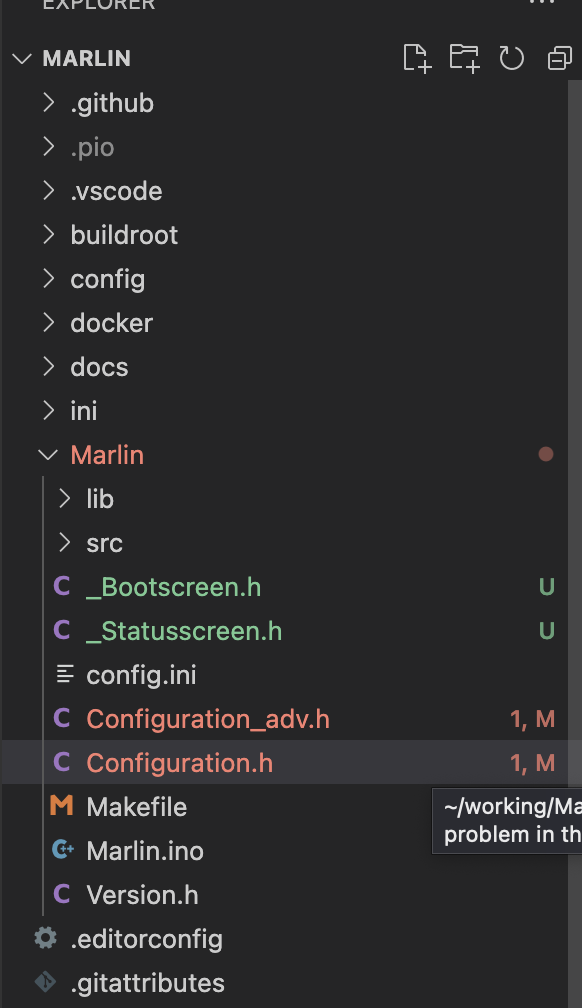
- In the left had column section you should see a file listing of the Marlin project direction.
- If you don't see this make sure you click the very top icon on the left nav bar
- From the left hand column location the Configuration.h and the Configuration_adv.h. Double click on each file to open it in the editor window.
- These are the only two files which you may need to modify if you want to enable some custom tailored setting.
- Now open a file explorer or terminal window and navigate to the 'Configurations' project directory that you downloaded early. This project contains all the known configurations for specific 3d printer hardware. For this how to I will be compiling for the much used Ender 3 models.
- Navigate to ../Configurations/config/examples and scroll through the list until you find your printer manufacturer.
- Then select your printer model for example ../Configurations/config/examples/Creality/Ender-3
- Finally select the motherboard, I choose 4.2.7 since I upgraded from the 4.2.2 to get the silent stepper drivers. ex: ../Configurations/config/examples/Creality/Ender-3/CrealityV427/
- Once you have located the correct configuration directory for your printer you should see 4 files in that directory:
- Configuration.h
- Configuration_adv.h
- _Bootscreen.h
- _Statusscreen.h
- Select each of these files and copy them to the Marlin project directory that you downloaded earlier, in the ..Marlin sub directory of the project defaults of these files exist there so you will be replacing them with the ones you copied.
- If you pasted them in the correct location you Marlin Auto build window should have updated with the new configuration files you just pasted
- Generally I believe most people will want to build the top environment, if you have a legacy board or firmware you may need to use one of the other environments
- As a test click the Build button on the environment you choose, once the build completes it should display a directory where the .bin firmware file will be placed. If there are any errors they will be displayed in the terminal window beneath the auto build window
- the following is common error, which I don't quite understand but is easily fixed: error: #error "Your Configuration_adv.h file is for an old version of Marlin. Downgrade Marlin or upgrade your Configuration_adv.h.
- to correct this error open the Configuration_adv.h locate the 'version' var definition (near the top) and change it to: #define CONFIGURATION_ADV_H_VERSION 02010200
- Make a similar change in Configuration.h, locate the 'version' var definition (near the top) and change it to: #define CONFIGURATION_H_VERSION 02010200
- Once the build succeeds the directory of the built source will be displayed. The 'firmware*.bin' file is the file you will place on your printers sd card.
Customizing the firmware
- Coming soon!


Comments
Post a Comment